You’ve already dealt with widgets in several different chapters of this book.
Until now, we’ve placed widgets using the Customizer. In this chapter, we’re going to look at the main “Widgets” screen.
After this chapter, you will be able to:
- Understand the main widgets screen.
- Control whether the theme places a sidebar on the page.
- Install a plugin that creates a widget.
- Show different widgets on different pages.
with the help of following features …
- The Widgets Screen and Sidebars in WordPress
- Adding New Widgets in WordPress
- Different Widgets on different Pages in WordPress
1. The Widgets Screen and Sidebars in WordPress
The main “Widgets” screen can be found under “Appearance” and then “Widgets”.
- On the left side of this screen, we can see all the different kinds of widgets that we could use.
- On the right side of the screen, we have all the different widget areas. The theme controls your widget areas, so these positions are unique to Astra. The image below shows that Astra has eight widget areas.
- Currently, the “Main Sidebar” region contains the most widgets:
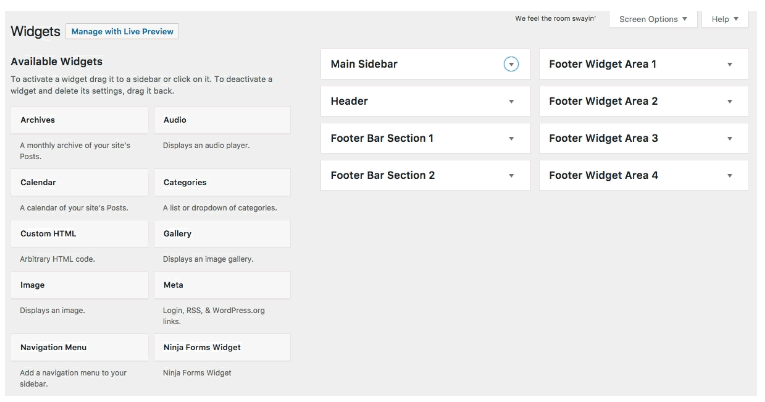

These six widgets appear on the right side of all our blog posts. So the question arises, why do these widgets appear only on the blog posts? Why do they not appear on the homepage or on pages?
The answer to that is “the theme controls your widgets”.
There is a very good reason why the chapter “WordPress Themes Explained” comes before the chapter “WordPress Widgets Explained”. Widgets entirely rely on the theme for their placement.
- Go to “Appearance” and then “Customize”.
- Click “Layout” and then “Sidebar”.
These are the settings that control your theme’s sidebars. Here you can move the sidebar to the left or right, or you can hide the sidebar entirely.
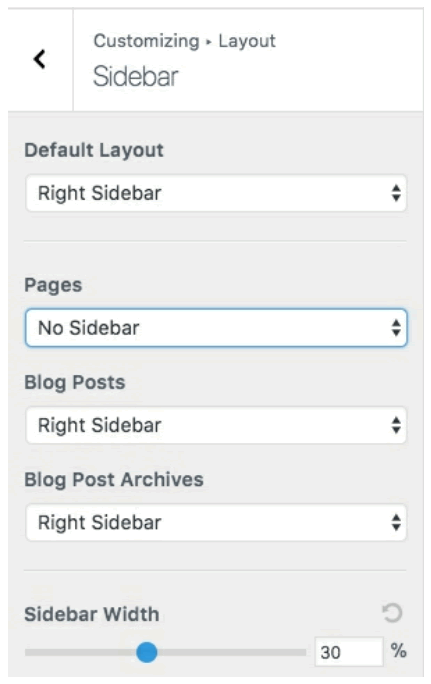
- If you want a sidebar on your pages, choose “Right Sidebar” under the “Pages” dropdown.

- If you save these theme changes and visit a page on the front of your site, you’ll see the sidebar:

2. Adding New Widgets in WordPress
So we know that the theme controls the widget regions. We can only place a widget in a particular location if the theme allows us to do so.
Widgets are also completely dependent on plugins. If you want to add a new widget, you will need to install a new plugin.
As an example, think about our “Attractions” pages that include “Zoo”, “Aquarium”, and “Museum”. These are connected using the Parent-Child system for pages, but that’s not a connection that visitors can see. Let’s install a plugin to allow visitors to easily browse through our Attractions.
- Go to “Plugins” and then “Add New”.
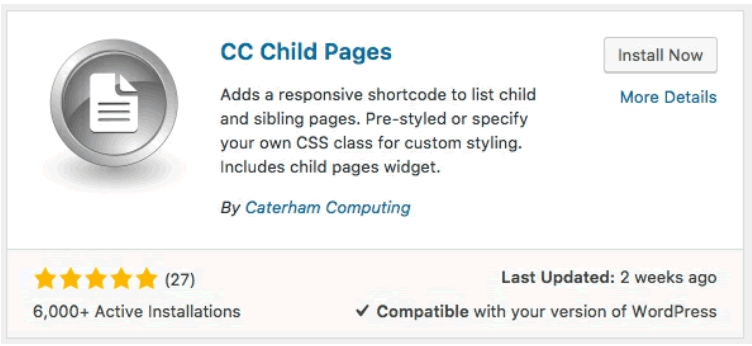
- Search for the “CC Child Pages” widget.
- Click “Install Now” and then “Activate”.
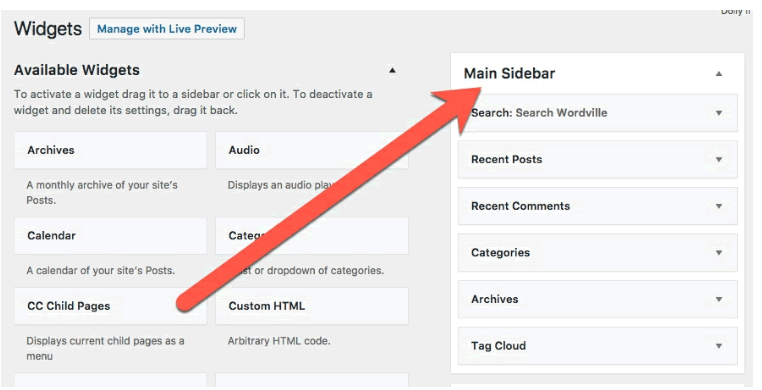
- Go to “Appearance” and then “Widgets”.
- Move the “CC Child Pages” widget to the “Main Sidebar” region.
- Set the title for the widget to “Wordville Attractions”.
- Check to enable “Show Sibling Pages”.
- Click “Save”.
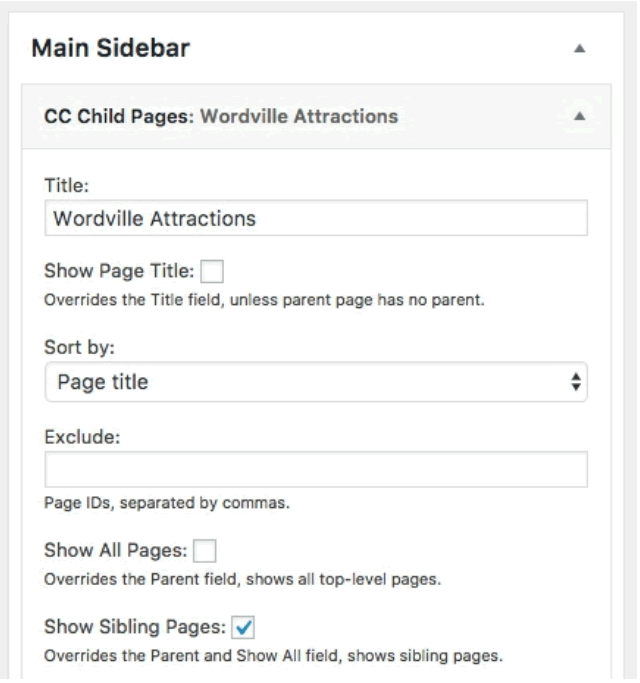
- Now when you visit the front of your site, go to the “Aquarium” page. In the right sidebar, you’ll see links to the other Attractions:

This is great, right?
Not quite. There’s still one problem.
This “Wordville Attractions” widget, and all the other widgets, appear on every page, regardless of whether they’re needed or not.
3. Different Widgets on different Pages in WordPress
A real website needs more flexibility than we’ve seen so far. You probably do not want to show the same widgets on every single page.
In this part of the chapter, we’ll show you how to control which widgets appear on which pages.
- Go to “Plugins” and then “Add New”.
- Search for and install the “Widget Options” plugin:

- Now when you go to the main “Widgets” screen, look at the active widgets on the right side of the screen. If a widget is placed into a widget area, it will have a variety of options. You can use all sorts of different criteria for hiding the widget.

- The choice we want for showing widgets is “Show on checked pages”. Select only the three attractions:

Now when you visit your site, the “Wordville Attractions” widget will only appear on the Attractions pages.


