In this page, we’re going to do some warm-up exercises in your WordPress site.
The goal is not only to get you familiar with WordPress’s user interface, but also to introduce you to some key WordPress features that you’ll be using throughout this page.
We’re not going to dive deep into any particular feature, but we will start to make some changes to your site.
We have ten small tasks that will help you feel more comfortable with WordPress:
- Write a Post
- Format a Block of Text
- Add an Image
- Add a Video
- Add a Page
- Add a Comment
- Change the Theme
- Rearrange the Sidebar
- Activate a Plugin
- Update your User Account
Table of Contents
Task-1 : How to Write a ‘Posts’ in WordPress
Let’s get started and write our first content in WordPress. The most popular option to create content in WordPress is using “Posts”.
In the black admin menu, go to “Posts” and then “Add New”.

Start typing in this highlighted box. Here’s a suggested title:
Title: Welcome to Wordville

Now let’s start writing the post. To write, you’ll need to click in the box labelled “Start writing or type / to choose a block”.
Body: This new website is going to talk about WordPress !

- Go to the top-right corner of the screen and click the “Publish” button, as shown in the image below.
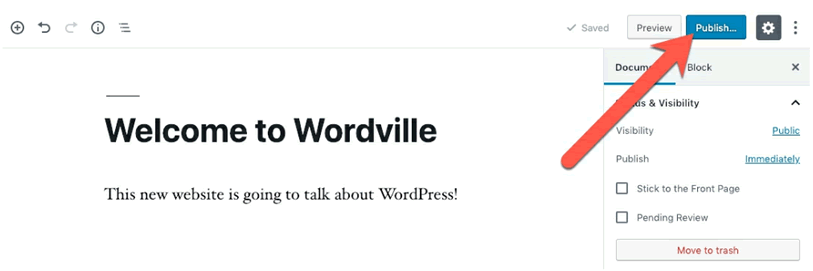
After clicking the “Publish” button, you’ll see a sidebar asking, “Are you ready to publish? Double-check your settings before publishing.”
This sidebar allows you to confirm information about your new post. For example, will it be visible to the public? Will it be published immediately? We’ll learn how to configure these settings later, but for now the default choices will work perfectly.
- Click the “Publish” button again.

You’ll now see at least a couple of success messages. On the left, you’ll see “Post published.” On the right, you’ll see “Welcome to Wordville is now live.
- ” Click the “View Post” button:

- You’ll now see your post published on your website. Your screen should look similar to the one below.
Congratulations! You’ve published your first WordPress blog post!

Task-2 : How to Format a ‘Block of Text’ in WordPress
At the moment, our first blog post is online, but it only has a single sentence of text. Let’s improve our text and add some formatting.
Click the “Edit Post” button, as shown below.

Let’s add some more text. Here’s the text we’re going to write:
“WordPress started in 2003 with a single bit of code to enhance the typography of everyday writing and with fewer users than you can count on your fingers and toes. Since then it has grown to be the largest self-hosted blogging tool in the world, used on millions of sites and seen by tens of millions of people every day.”
You’ll see a paragraph of text under “First Text Sample”. Select and copy the text on that page.
- Either write or paste this text into your WordPress post, below the first sentence that you wrote earlier. Here’s how your screen should look now:
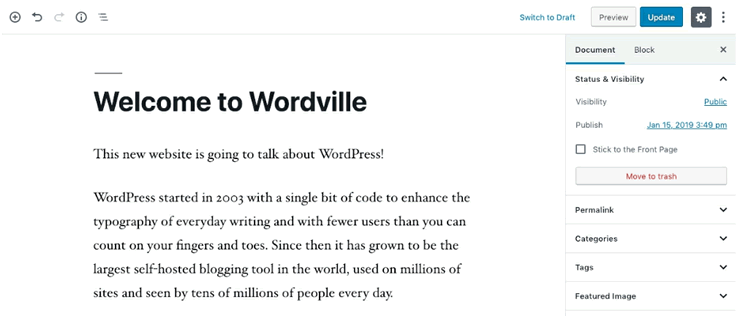
At the moment, this text has no formatting. Let’s see how to change that.
If you hover over the box with your new text, you’ll see some formatting controls:
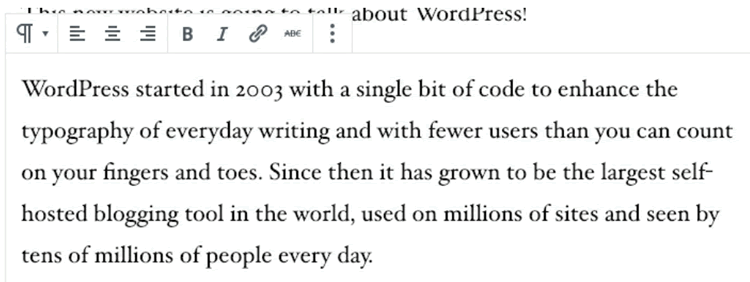
Let’s see an example of how it works.
- Select part of the text with your mouse.
- Click the “B” button.

Here’s how your text will look after you’ve added the bold formatting:
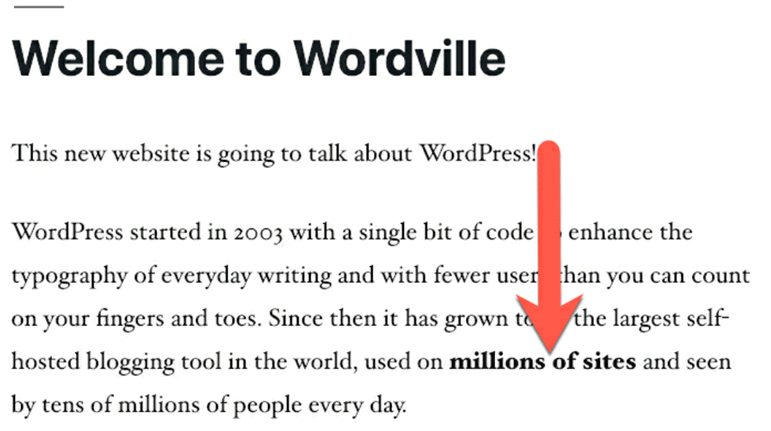
Go ahead and try that with Italic text, using the image below as a guide.
- Select part of the text with your mouse.
- Click the “I” button.

In addition to formatting, you can add headings to your text.
- In the top-left corner of your screen, click the + icon shown below:
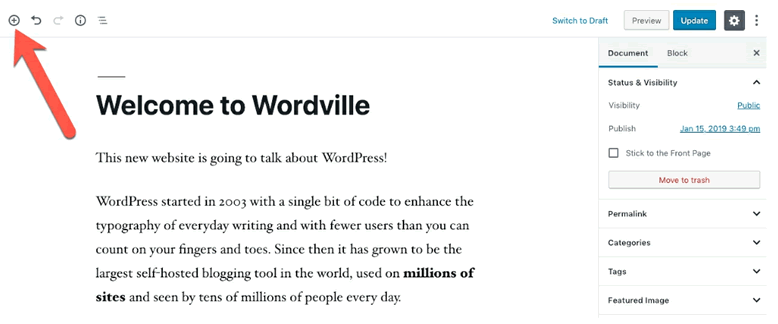
Clicking this + icon will give you a wide range of choices. We’re going to dig into these choices throughout this book.
- Click “Heading”.

- You’ll now see a new box with the label, “Write heading…”.
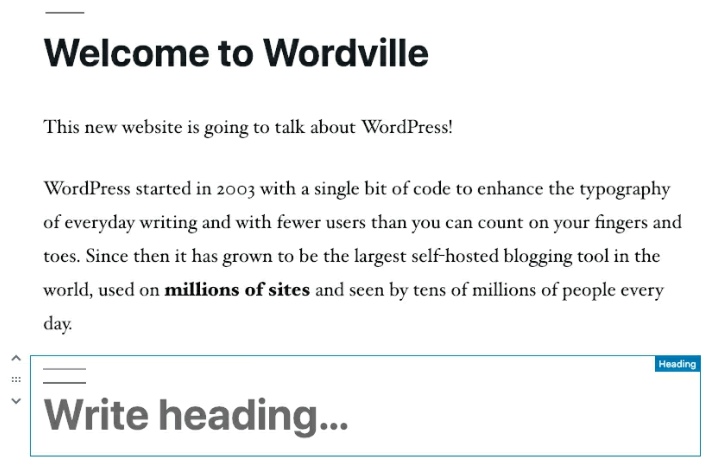
- In this “Write heading …” box, let’s change the text. Write “About WordPress.org”.

Now let’s add some more text. I’ve included the text below.
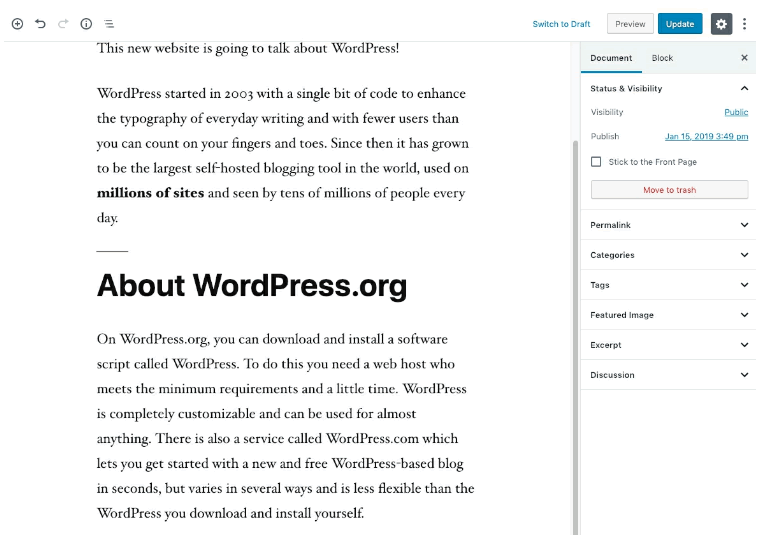
“On WordPress.org, you can download and install a software script called WordPress. To do this you need a web host who meets the minimum requirements and a little time. WordPress is completely customizable and can be used for almost anything. There is also a service called WordPress.com which lets you get started with a new and free WordPress-based blog in seconds, but varies in several ways and is less flexible than the WordPress you download and install yourself.”
- Here’s how that text will appear when you add it below your heading:
There are other formatting options you can try. For example, WordPress text is aligned to the left by default, but you can align it to the center or right.
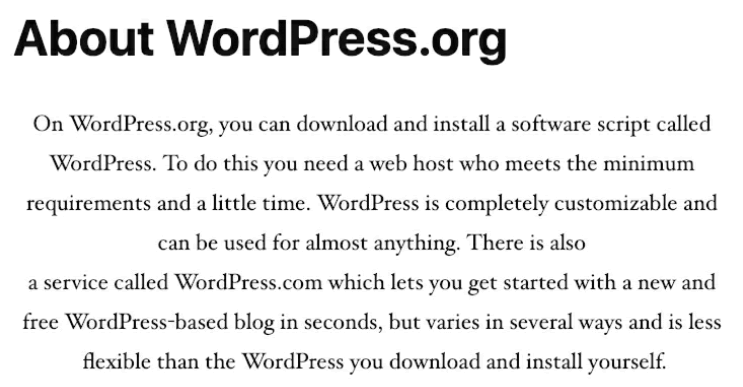
- Select all the text and click the “Align text center” button:

This image below shows the result after you have centered the text:
- Undo the centered alignment by selecting all the text and clicking the “Align text left” button.
- You can add links to other websites. Select the “WordPress.com” text, and then click the “Link” icon.
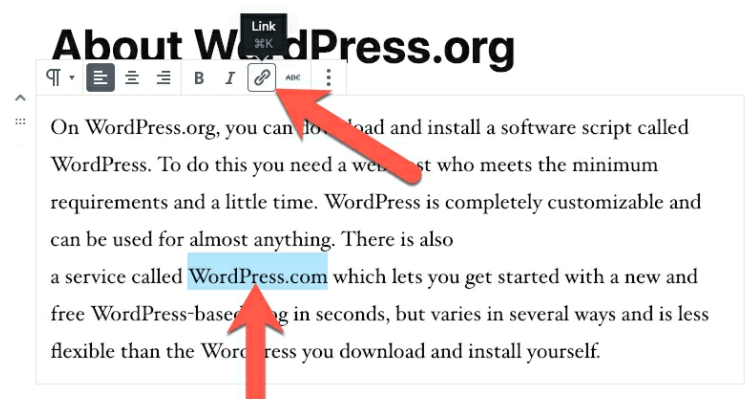
- Then you can enter the URL for the site you want to link to, and be sure to click the arrow to complete the process.

When you’ve added a link, the text should be marked in blue with a line underneath:

After you’ve finished experimenting with the formatting toolbar, go to the right of your screen and click “Update”.

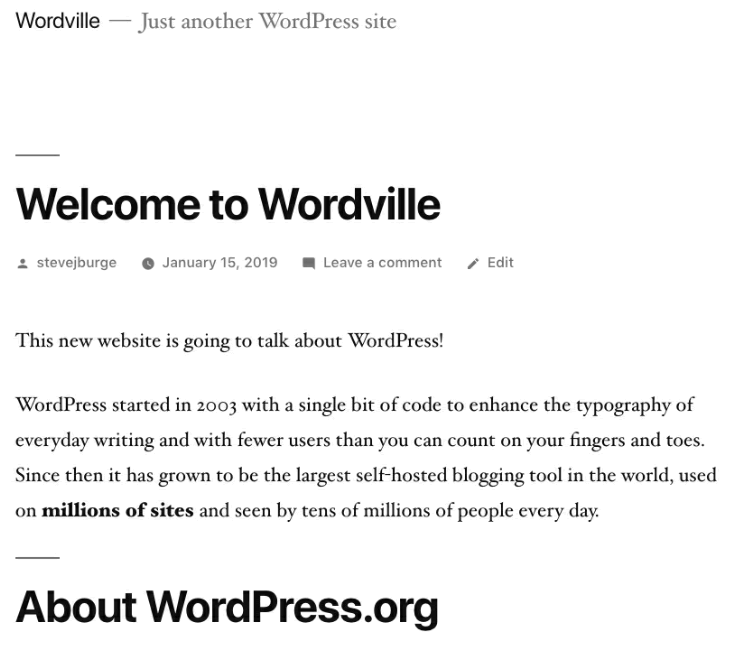
- Click the “Preview” button which is directly next to the “Update” button. You’ll now see that your post has a lot more text, and also has some formatting, as in the screenshot below.
Task-3 : How to Add an ‘Image’ in WordPress
Now that you know how to format text in WordPress, let’s liven up our content with images and videos.
- Keep your post editing screen open. In another tab or browser, go to https://wordpress.org/about/logos/.
- Click the “PNG (BaseGray/transparent)” link, shown in the image below.
- You’ll see a copy of the WordPress logo. Download this to your desktop. The file will have the name WordPress-logotype-standard.png.
Now let’s add the WordPress logo to our post:
- Go back to your “Welcome to Wordville” post.
- Click the + icon in the top-left corner.
- Click the “Image” block.
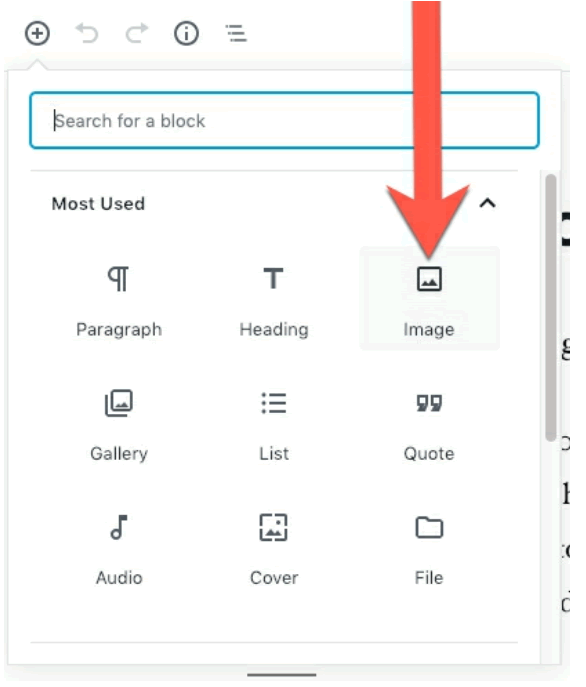
- You will now see your new Image block below the existing content.

- You can drag-and-drop the WordPress-logotype-standard.png file directly into this block area. Or you can click “Upload” and select the file from your desktop. No matter which option you choose, you’ll see the WordPress logo inside your post:

Task – 4 : How to Add a ‘Video’ in WordPress
If anything, it’s even easier to add video to WordPress posts. If the video is hosted on YouTube.com, Vimeo.com or another popular video site, then all you need to know is the URL of the vide o.
In this example, I’ve taken the URL from a video of Matt Mullenweg, one of the co-founders of WordPress. The URL is: https://www.youtube.com/watch?v=Nl6U7UotA-M. (Please note the character after “N” and before “6” in this URL is a lowercase “L” and not the number “1”.)
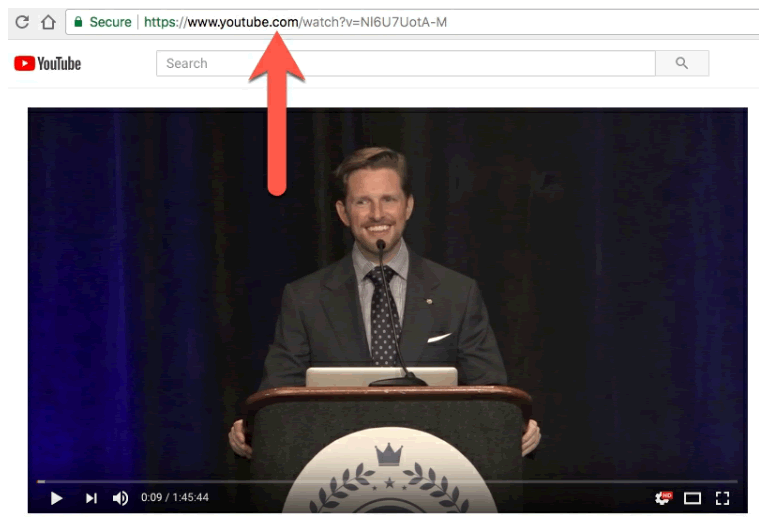
- Once you have the URL for the video, click the + icon to add a new block to your post.
- There’s a search box inside the block selection popup. Search for “YouTube”.
- Click “YouTube” when you’ve found the correct block.

- Enter the URL of the YouTube video: https://www.youtube.com/watch?v=Nl6U7UotA-M.
- Click the “Embed” button.
- WordPress will automatically turn the link into a video:

Now that you’ve added these changes, let’s see how your post looks with an image and video.
- Click the “Update” button to save your changes.
- Click the “Preview” button and you’ll see your post now looks much more interesting!
Task – 5 : How to Add a ‘Page’ in WordPress
To start this next task, you need to return to the WordPress dashboard.
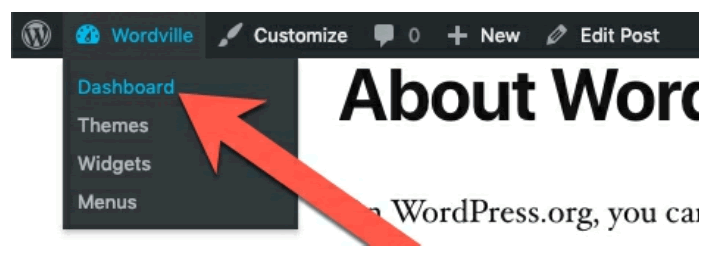
- Go to the top of the screen and hover over your site name.
- Click the “Dashboard” link that appears under your site name.
In this task, we’re going to add more content.
This time, we’re using the “Pages” option, rather than “Posts”. What’s the difference between Posts and Pages? Let’s create a Page and see what differences we can see.
- Go to “Pages” and then “Add New”.
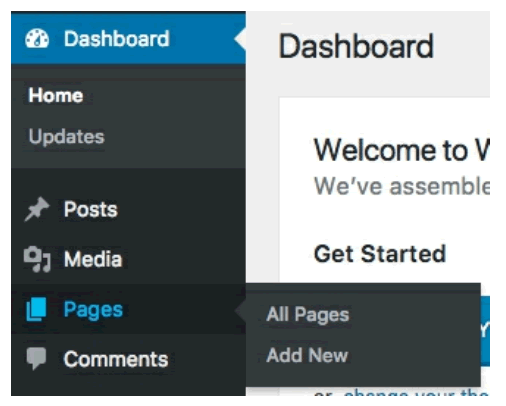
Enter the following details:
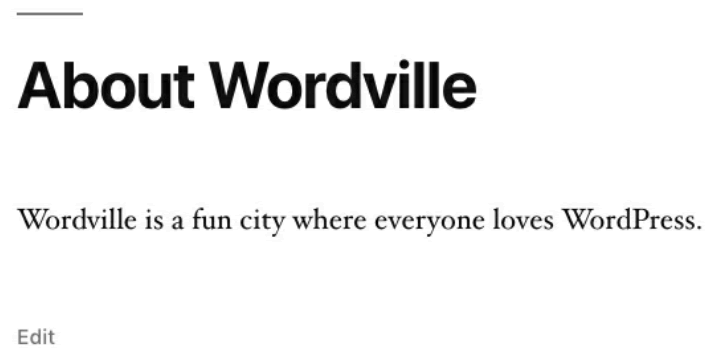
- Title: About Wordville
- Body: Wordville is a fun city where everyone loves WordPress.

- Click the “Publish” button twice.
- Click the “View page” link at top of the screen or the “View page” button in the right sidebar.
- You’ll now see that your page is visible on the site:
So Pages are similar to Posts, but have several small differences. What exactly are those differences?
These are some of the differences you might notice:
- Posts show the date they were published. This is because they contain time-sensitive content. Pages don’t show the date they were published. The reason for this is because their content is timeless.
- Posts often have URLs containing the date they were published. For example, http://wpexplained.com/2019/1/20/welcome-to-wordville/. Pages have short, simple URLs with no date.
- For example, http://wpexplained.com/about-wordville/.
- Posts show the name of the author. Pages don’t show the name of the author.
- Posts have an area for comments underneath the body. Pages don’t have a comments area.
- Posts appear on your site’s homepage automatically. Pages don’t appear on your site’s homepage.
Why do Posts and Pages have these different features ?
- Posts are for timely, topical and opinionated content. For topical content, the date is important. For opinionated content, the author name and date are important.
- Pages are for static content that rarely changes. Good examples of Pages include your “About Us”, “Terms and Conditions”, and “Location” pages. None of the content on those pages is likely to change very often. Also, the name of the author isn’t important, and you probably don’t want people to leave comments.
Task – 6 : How to Add a ‘Comment’ in WordPress
In the previous task, we noticed that Posts have comments, but Pages do not.
But, what does it mean to leave a comment in WordPress? Let’s find out.
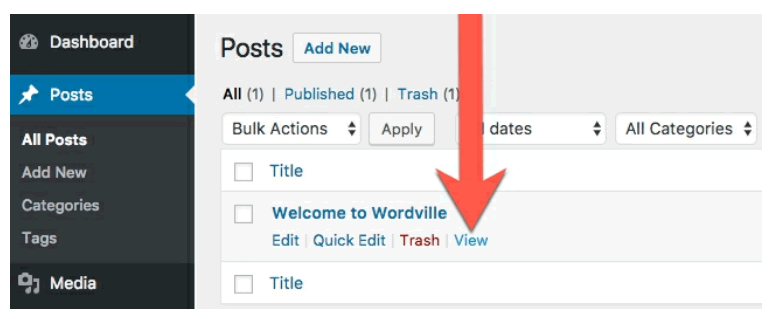
- In your WordPress dashboard, click “Posts”.
- Click “View” under the “Welcome to Wordville” link:
- Scroll down to the bottom of your post and find the “Comment” area. It will look like this next image.
- Leave a comment and click “Post Comment”.

- Your comment will instantly be published:

- Go back to your WordPress dashboard. As we saw earlier, often the quickest way to do this is via the “Dashboard” link in your admin menu.
- Click the “Comments” link on the left side of the site. You’ll now be able to see all the comments on your Posts.

On this screen, you can manage your comments. If you don’t want a particular comment on your site, you can click “Unapprove”, “Spam”, or “Trash”. If you like the comment, you can also click “Reply” and continue the discussion right here.

Task – 7 : How to change the ‘Theme’ in WordPress
In this task, let’s change the theme to something that is more exciting to look at.
- Go to “Appearance” and then “Themes”.

You’ll now see at least three themes to choose from. WordPress releases a new theme almost every year, so these themes are named after the year they were released.

- We’re going to choose the “Twenty Seventeen” theme. Click the “Activate” button.
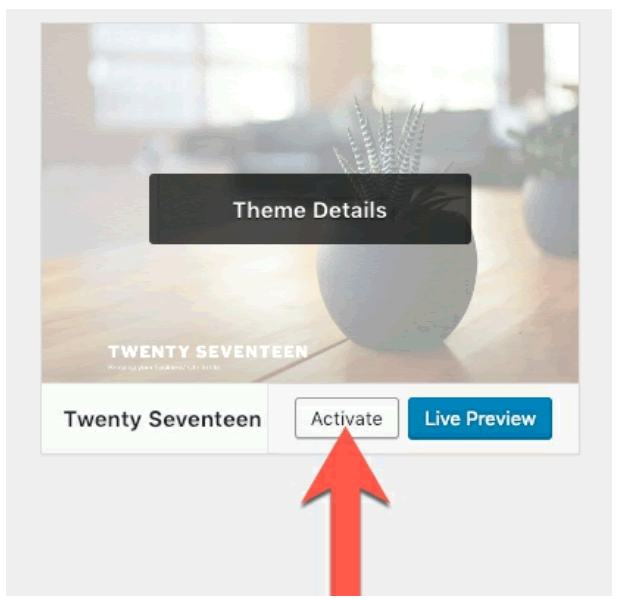
Now we’re going to add some Wordville-specific touches to our new theme.
- Click the blue “Customize” button for Twenty Seventeen:
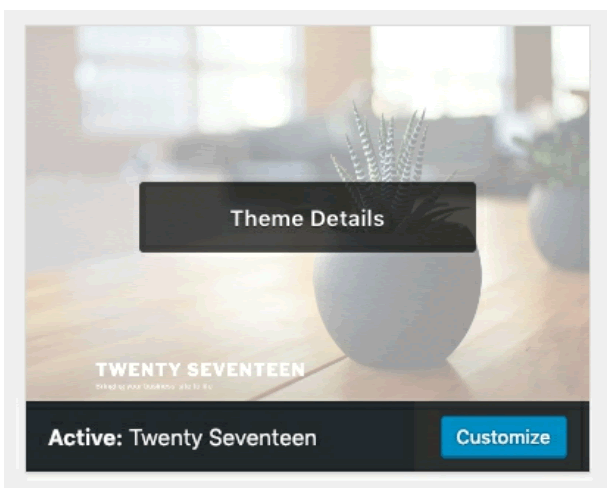
You’ll now see a full-screen page designer for your WordPress site:
- On the left-hand side are lots of configuration options.
- If you click on any of the blue pencil icons, you’ll automatically be taken to the relevant configuration option.
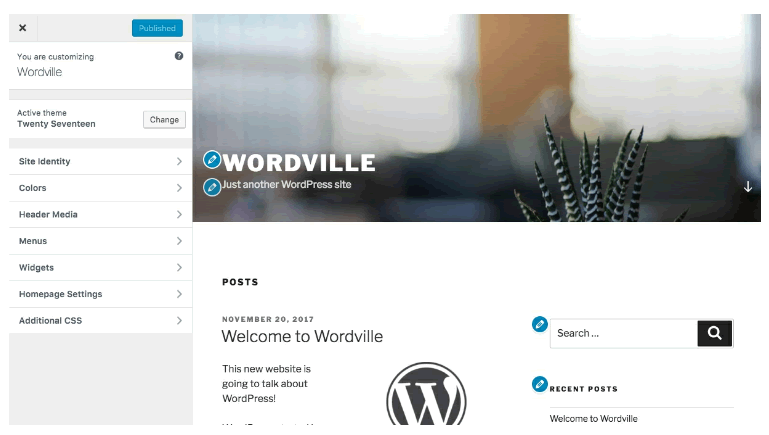
- Click on the blue pencil next to “WORDVILLE”, as shown in the next image. Your site title may be different, but we’re going to fix that now.
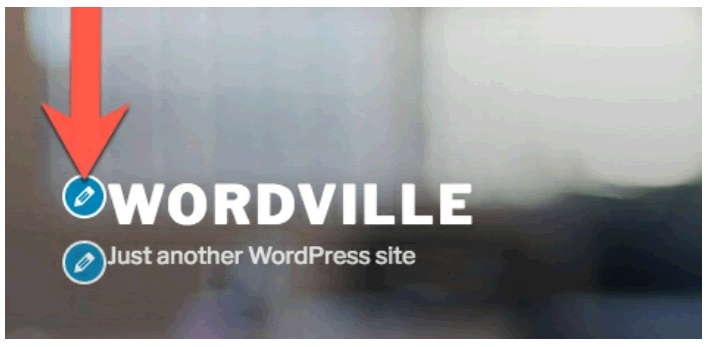
You can now edit your “Site Title” and “Tagline” settings:
- Site Title: Wordville
- Tagline: A city that loves WordPress
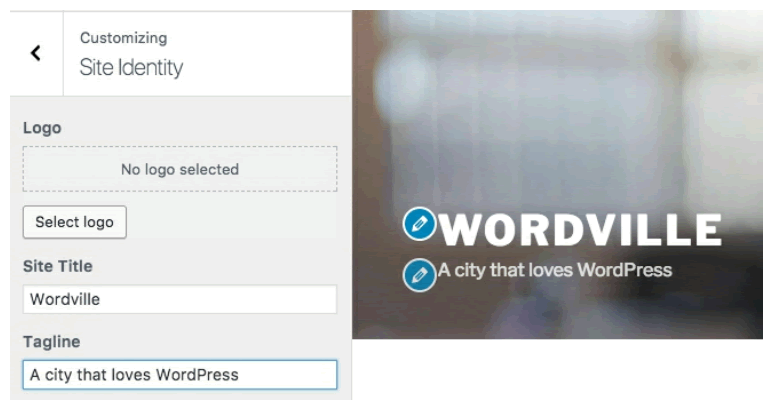
While we’re here, we can also upload a logo for our site.
- Click the “Select logo” button. Upload the file called wordville-logo.png from the Resources folder.
- After uploading the logo, you’ll see a “Crop Image” screen. Later in the book we’ll explain more about image cropping and editing, but for this task you can click the “Crop Image” button. It won’t make any changes to your image.
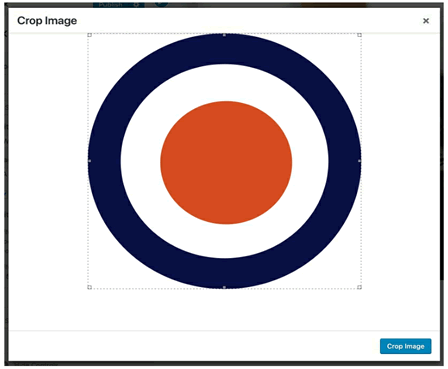
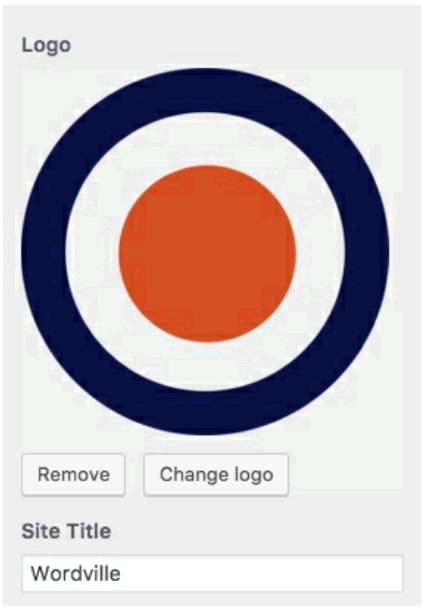
- Now you will see your new image is visible in the “Logo” area:
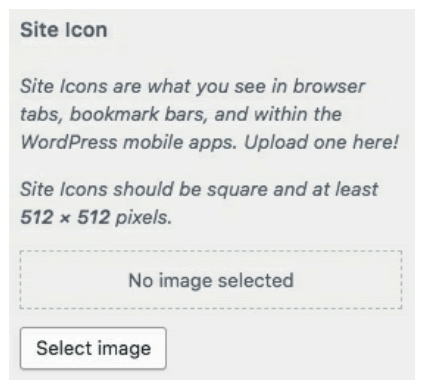
Let’s repeat that process for the “Site Icon” option. This is down in the bottom-left corner of the sidebar.

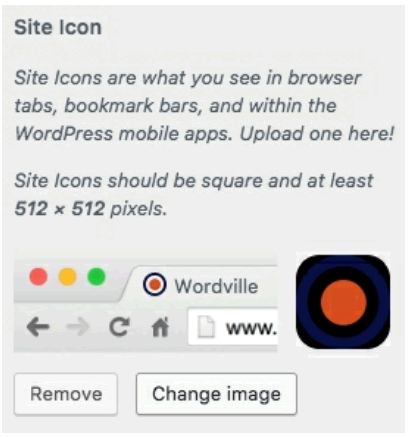
As WordPress explains, Site Icons are what you see in browser tabs, bookmark bars. They are also often called “favicons”.
- Click “Select image” for the Site Icon:
- Browse through the images you have uploaded to your site.
- Select the same wordville-logo.png image that you used for the Logo.
- You will now see this image used for your Site Icon also:
Next, let’s change the header image for our site.
- To do this we will need to exit the “Site Identity” area. Click the arrow next to “Site Identity”.

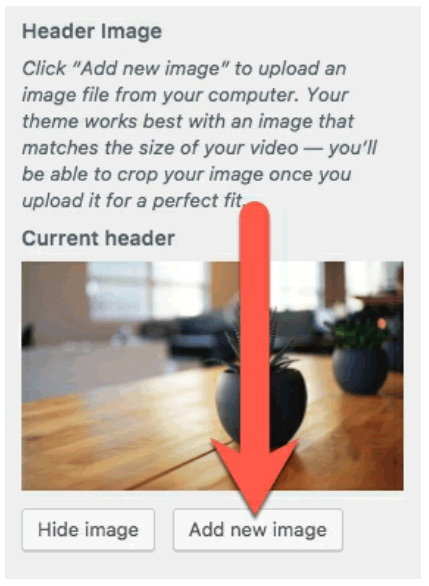
- Click “Header Media” in the left column, as shown in the image below.

- Click “Add new image”, as shown here.
- Open the “Wordville Resources” folder that you downloaded.
- Upload the file wordville-header.jpg.
- Click the blue “Select and Crop” button in the bottom-right corner.
- WordPress will suggest that you crop your image. Click the blue “Crop Image” button.

- You’ll now see you have a new header image for your site!
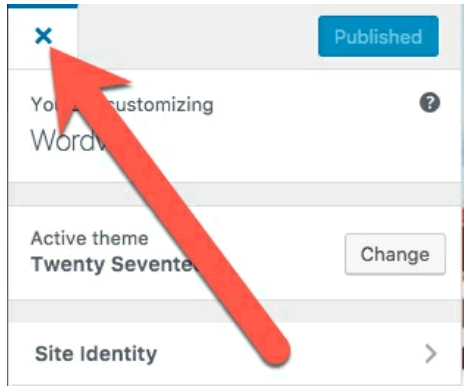
- To complete the change, click the blue “Publish” button in the top-left corner.

- To exit this screen, you can click the X, next to the “Publish” button:
- Click the “Wordville” link in the top-left corner.

- You can now see the Site Icon live in your browser tab:

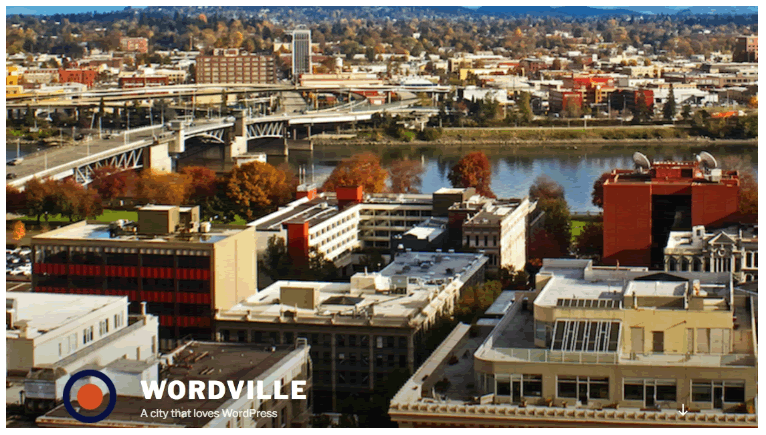
- You can also see the new, large header image in action on your site:
Task – 8 : How to ‘Rearrange the Sidebar’ in WrodPress
Looking at your site, you can see your header and your content. However, there’s a sidebar with several small boxes. These are called “widgets”. You can see:
- A Search box
- A list of Recent Posts
- A list of Recent Comments
- A link to Archives, or posts organized by the month of publication
- A list of Categories that can be used to organize posts
- A box called “Meta” with several useful links

You can organize and control these widgets. Here’s how it’s done:
- Click the “Customize” link in your admin menu, as shown here.

- Click the pencil icon next to any of the widgets in the sidebar:

In the left sidebar, you can now configure these widgets.
- Enter “Search Wordville” in the “Title” area for the Search widget.
- You’ll see this reflected immediately in the main part of the screen, as shown in the image below.

You can also rearrange and remove widgets in here:
- Try dragging-and-dropping these widgets to change the order.
- Try clicking “Remove” for the “Meta” widget:
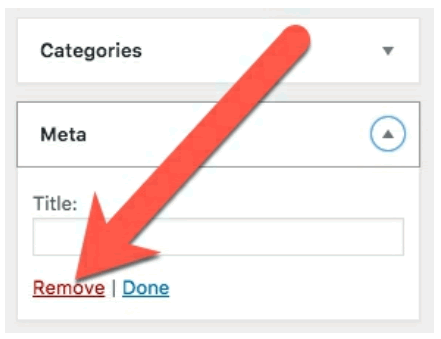
- After making those changes, your list of widgets might look like this:

Visit the front of your site, and you’ll see that your design has been transformed since the start of the chapter. You have new content, a new header image, and a new logo!
Task – 9 : How to ‘Activate a Plugin’ in WordPress
In the previous few tasks, we changed how your site looks.
This task is not going to bring such major changes, but it will show you how to add new features for your WordPress site.
- Go to the “Plugins” link in your site’s dashboard:
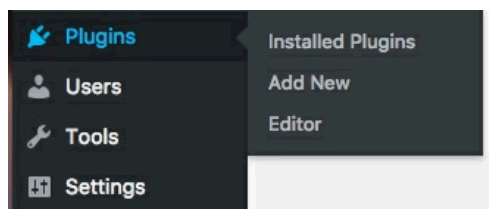
You’ll see two plugins. These both offer extra features for your WordPress site.
- Akismet: This plugin can protect your blog from spam. We show you how to use Akismet in the chapter, “WordPress Site Maintenance Explained”.
- Hello Dolly: This shows lyrics from the “Hello Dolly” musical inside your site.
You think I’m joking about that last plugin? Trust me, I’m not!
- Click the “Activate” button next to “Hello Dolly”.
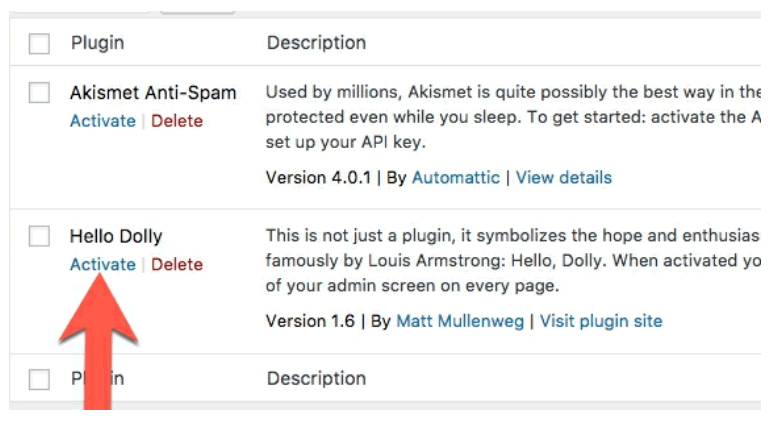
Look up in the top-right corner of your site. Every time you load a new page, you’ll now see a quote from “Hello Dolly”.

If you’re a little confused about what Hello Dolly is, allow me to suggest some background reading! https://en.wikipedia.org/wiki/Hello,Dolly!(musical)
Why is this plugin inside WordPress? Partly it’s there as joke, and to offer a touch of humor. Partly it’s there as an example, for tutorials like this. Partly it’s there because of tradition – it’s been in WordPress for 15 years now.
Task – 10 : How to ‘Update your User Account’ in WordPress
For our final task, let’s update your user profile.
- In the top-right corner, use the pull-down menu and click “Edit My Profile”.

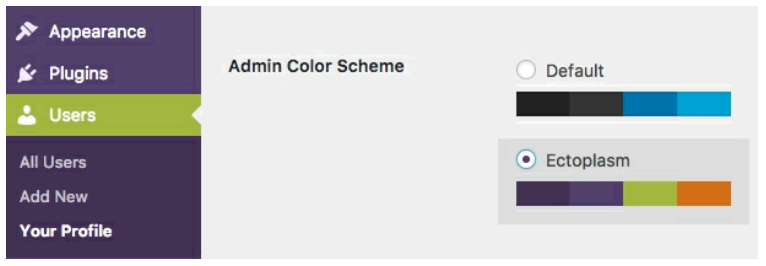
On this next screen, you can choose your personal settings for this site. For example, you can change the color of the admin dashboard. “Ectoplasm” offers a purple color scheme. We’re going to use the black color scheme throughout this book, but it won’t hurt if you choose a different color.
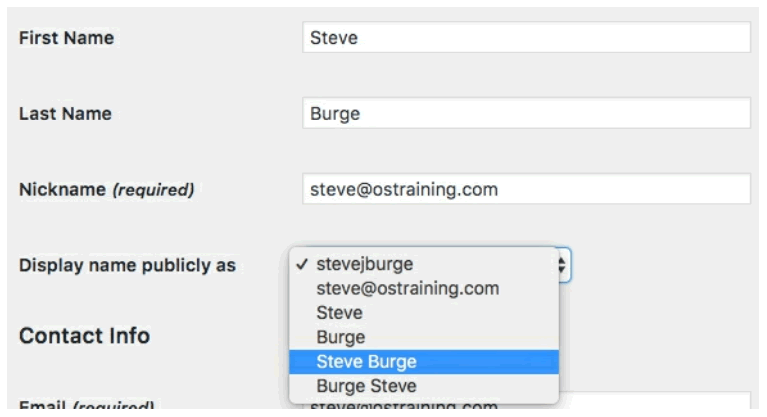
- You can also control how your name is displayed throughout the site. Until now, my name has been showing as “stevejburge”. I can fix that using the setting called “Display name publicly as”:





Comments 22