We are going to take a look at Posts in WordPress. WordPress started out as a blogging platform, and as a result it’s really excellent at blogging. A blog is basically an online journal or diary. Posts are entries in that journal or diary. But they don’t have to be, there are lots of different things that have dated content like that.
We are building a site for Wordville, and so we are going to use posts as news items. If you think about it, they are very similar. News items have a headline, some content and a date, which is exactly like a blog post or journal entry.
In this page, you should be able to:
- Use more advanced features in the text editor.
- Use the publishing features for WordPress posts.
- Choose which Screen Options you want to show.
- Manage content directly from the All Posts screen.
- Put together everything you’ve learned so far and create a media rich post.
WordPress Post includes the follwoing features & Options …
- Creating More ‘Posts’ in WordPress
- Reordering ‘WordPress Blocks’
- Using the ‘Block Toolbar’ in WrodPress
- Using the ‘Block Settings’ in WordPress
- Extra ‘Post Features’ in WordPress
- The ‘Extra Publishing Features’ Inside the Post Screen in WordPress
- ‘Revisions Featues’ for WordPress Content
- Exploring the ‘All Posts’ Screen in WordPress
1. Creating More ‘Posts’ in WordPress
On your main WordPress dashboard, there may be as many as three different ways to create a new post:
- From the left hand menu, there is the “Posts” button.
- At the admin bar at the very top of the page, there is a “+ New” button, which allows you to add a new post.
- On the dashboard itself, there’s a “Write your first blog post” link.
All three of these do the exact same thing, so it doesn’t matter which one you click. The one in the admin bar is always with you as long as you are logged in, so it may become the most useful.

The image below shows the “Add New Post” page.
Let’s add a second blog post to our WordPress site.
Title: Join the Annual WordPress Events!
Body: Every year WordPress holds a major event in Europe and North America. In 2018, thousands of WordPress fans met in Nashville and Belgrade.

You create WordPress posts using blocks. Almost everything you want to add to WordPress is available as a block. Let’s see some examples in this chapter. First, let’s add a list of recent WordPress events.
- Click the + icon in the top-left corner.
- Choose the “List” block.
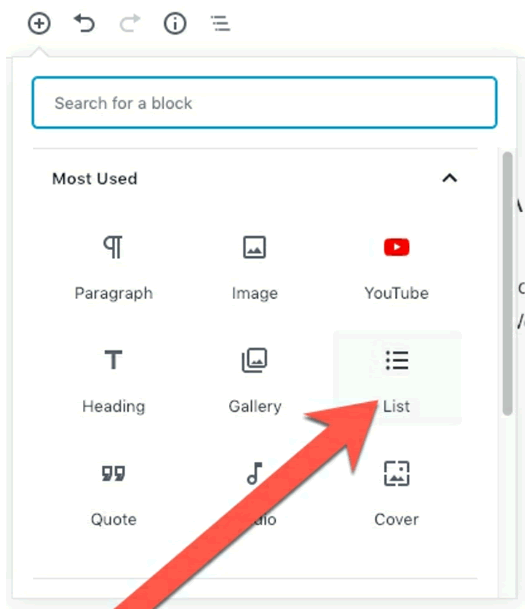
You’ll now see a new block with bullet points ready for you to use:

Enter the following bullets:
- 2017: Nashville and Paris
- 2016: Philadelphia and Vienna
- 2015: Philadelpha and Seville

Let’s explore another block. This time we’ll add a “Quote” block.
- Click the + icon in the top-left corner.
- Choose the “Quote” block.
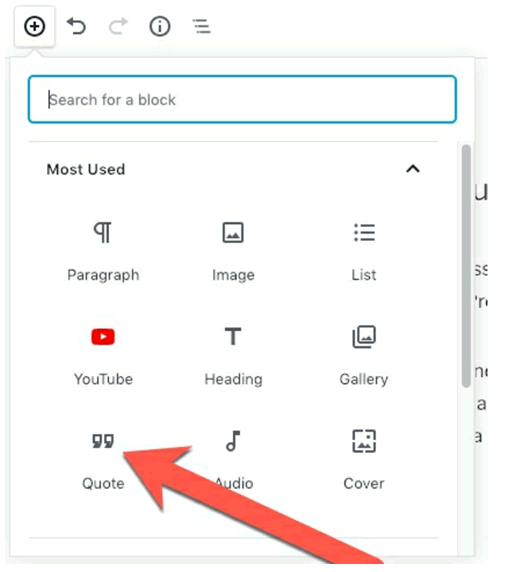
Here is how the empty Quote block will appear in your post:

Type: I went to WordCamp US in Nashville in 2018. It was great! You should come and join us in 2019!
Citation: Steve from OSTraining
2. Reordering ‘WordPress Blocks’
WordPress blocks are organized vertically on the page, but they can be rerranged. Let’s see how to reorder our blocks.
- Click the + icon in the top-left corner.
- Choose the “Heading” block.

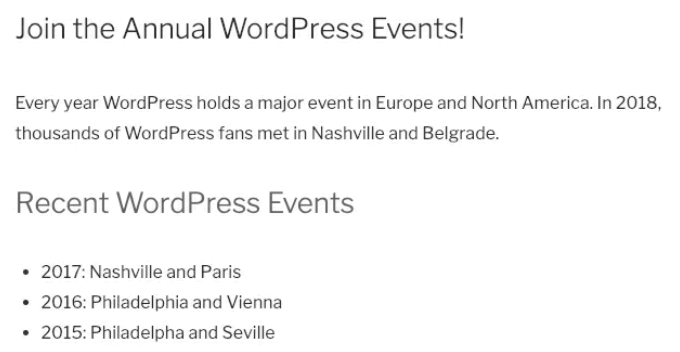
Heading: Recent WordPress Events

By default, WordPress blocks are added to to the bottom of the screen. However, this heading should be placed above the List block we created earlier.
- Select the up arrow next to the “Recent WordPress Events” block.

Click the up arrow twice so that your new Heading block appears above the List block:
Let’s try another approach to reordering our blocks.
- Click the + icon in the top-left corner.
- Choose the “Heading” block.
- Heading: A Happy WordPress Event Attendee
- Select the box with six dots. It’s just underneath the up arrow we used in the previous step:

You can now drag-and-drop this block to a new place on the screen. This process can be a little tricky, but you’ll get it with practice. Try to place this Heading block above the Quote block.

3. Using the ‘Block Toolbar’ in WrodPress
Each WordPress block has a small toolbar that’s availably directly over the block. This image shows the toolbar over the Paragraph block.

The icon on the left allows you to change the block type. This only works for similar blocks: you can’t change a YouTube block to a Quote block. We are looking at a Paragraph block, so this “Change block type” icon allows us to choose a Heading, List, Quote, Preformatted or Verse blocks. Those options are available because they are also text blocks.

Elsewhere on the toolbar are some formatting options. From left-to-right you can see these options:
- Align text left
- Align text center
- Align text right
- Bold
- Italic
- Link
- Strikethrough
Let’s take a look at the Link feature, which is one of the most important options in the toolbar.

- Add a new sentence to this Paragraph block: Click here to see all the WordPress events.
- Using your cursor, select your new text.
- Click the Link icon.

- Enter this URL: https://central.wordcamp.org/
- Click the arrow marked below. This will add the link to the text.

- You’ll now have a new link added to your Paragraph block:

Finally, look for the three dots in the top-right corner of the block. This icon hides several important block options. For example, you can use these options to duplicate your block. You can also insert another block directly before or after this block. That saves the hassle of creating a block at the bottom of the screen and then moving it up.

Notice the “Add to Resuable Blocks” link in the image above? This is a really useful feature.
- Click the “Add to Resuable Blocks” link for a block.
- Enter a name for the block.
- Click “Save”.

Now when you add a new block, there will be a “Reusable” area of the screen. You can easily access any block that you have saved.

4. Using the ‘Block Settings’ in WordPress
Every block has a toolbar, and it also has settings in the right sidebar. For example, place your cursor into the first Paragraph block. In the right sidebar, you’ll see configuration options. In this example, you can change the Font Size, Background Color and Text Color for this block. You can also add a Drop Cap, which means the first letter will appear to be over-sized.
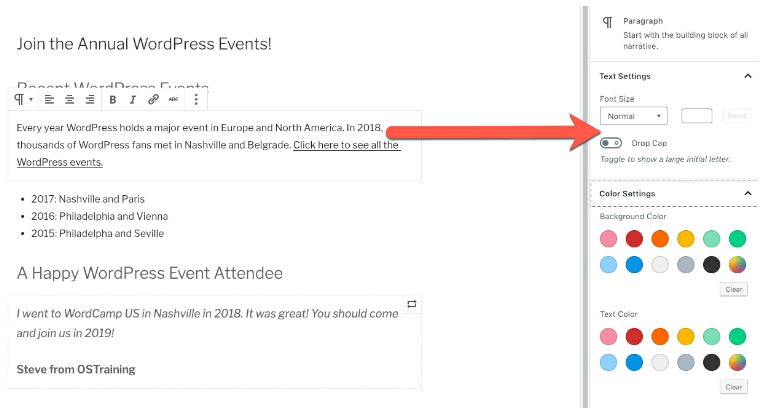
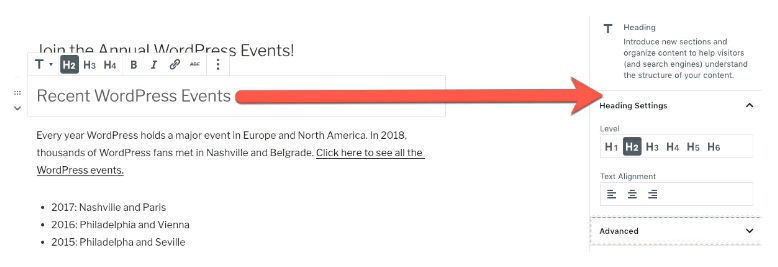
The Paragraph block has more features than most. Some blocks only have a couple of options, as is the case with the Heading block, shown below.
5. Extra ‘Post Features’ in WordPress
In the top-left corner of WordPress posts, you’ll find several useful tools. Next to the + icon, you can see “Undo” and “Redo” buttons. WordPress remembers all your changes, so you can use these buttons to undo or redo any changes to your post

Next to the Undo and Redo buttons, you’ll find a “Content structure” icon. This gives you an overview of your post. You’ll see the number of words, headings, paragraphs and blocks.

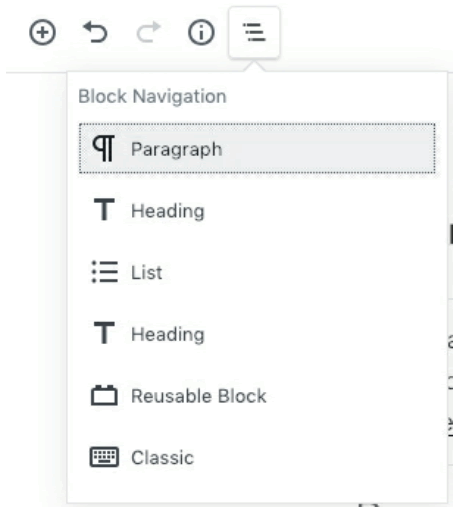
The fifth icon up here is called “Block navigation” and it will give you a clear overview of the blocks in this post. Click on any of these links and WordPress will automatically take you to that block. This can be very useful if you have a long and busy post.
6. The Extra Publishing Features Inside the Post Screen in WordPress
Look over to the right-hand side of the screen, and you’ll see a series of extra features to give you more control over your content.

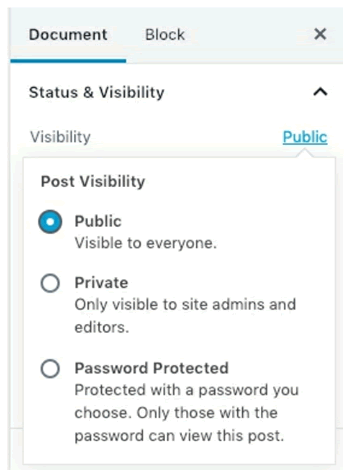
The “Visibility” option allows you to decide who can see your content. The default is “Public”, but you can choose to keep this post “Private” so that only high-level users on your site can access it.
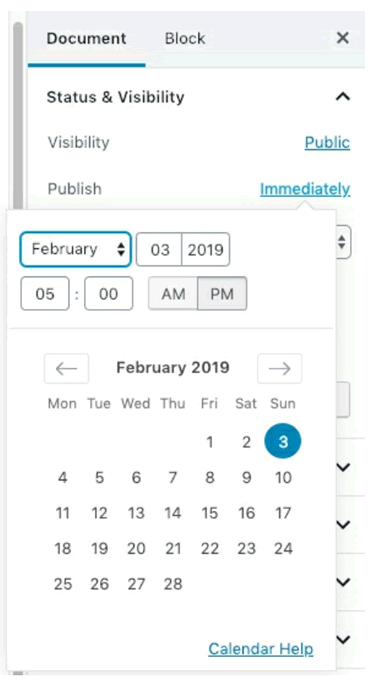
You can choose to publish your post now, or in the future. The default setting is “Immediately”, but click on that link and you can choose a publishing date and time in the future.
In the next image, you see that just under the “Status & Visibility” box are two more boxes. One is called “Categories” and the other is called “Tags”. These are two ways to organize your content. They are important, and we’ll look at them in more detail in the next chapter.

Below the “Tags” box, you see the “Featured Image” box. With the “Featured Image” option, you can associate an image with this post. Where your image appears can vary. Different themes will put the “Featured Image” in different places. For example, it might display the image at the top, side, or bottom of the post.
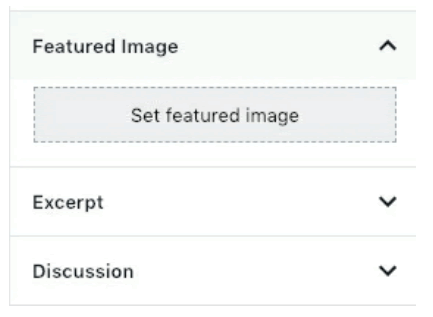
Let’s see where our theme will place the Featured Image.
- Click “Set featured image”.
- Upload the wordcamp-logos.png file from your Resources folder.
- Click the “Set featured image” button.
- You’ll now see the new image appears in the box, as in the image below.

- Click the “Publish” button twice in the top-right corner of the site.
- Visit your post on the front of the site, and you’ll see the header image above the post:

7. Revisions Featues for WordPress Content
Are you clumsy?
Are any of your work colleagues sometimes a little clumsy?
If so, you’ll love the Revisions features.
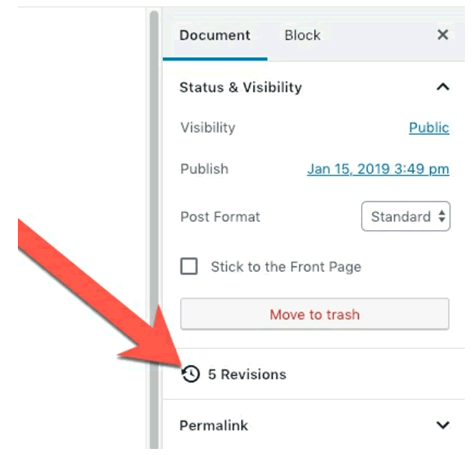
WordPress saves a copy of your work every time you click on the “Publish” button. Both the old and new versions will be saved. If you made a mistake, you can then roll back to an earlier version.
You can access the Revisions feature via the “Revisions” box, as shown below.
- Click the “Browse” link.
- You’ll see a page like the one below with an old copy of your post in red. The current version is in green.
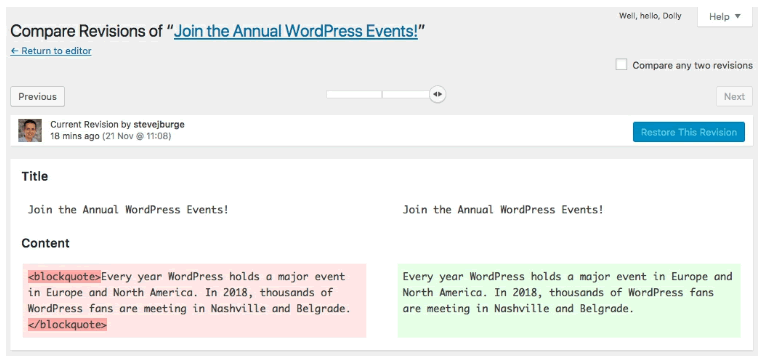
- You can use the slider bar at the top to move between different versions.
- If you want to roll back to a previous version, click the “Restore This Revision” button, as shown below.

To exit the Revisions screen, click the “Return to editor” link in the top-left corner:

So, don’t worry if you make a mistake when writing your posts. You can always go back to the previous versions.
Plus, it gets better than that. WordPress saves a copy of your blog post every few seconds. So, if you your computer shuts off, you lose your internet connection, or your tab gets closed, your post will still be there and you will be able to retrieve it. You will see a message like this, offering to restore the version you lost:

8. Exploring the ‘All Posts’ Screen in WordPress
We are going to take a look at how your posts are organized in the admin area.
- Click the “All Posts” link in the admin menu.
Here you can see a list of your posts and a variety of information about the individual posts:
- Title
- Author
- Categories
- Tags
- Number of Comments
- Date of Publication

You can change the way these are displayed.
- Click on “Date” and you’ll see the posts displayed by date.
- Click on “Title” and you’ll see the posts displayed alphabetically.
You could also invert the date, so that you could see the oldest posts first instead of the most recent posts first.
- Click on either “Author”, “Categories”, or “Tags”, and you’ll see only posts that are related to that specific author, category or tag.
In the top right, there is a “Search” box. Once you have more than a dozen posts, it can be very convenient to be able to search for a specific post using keywords.
If you hover over a post, you will see a number of options: “Edit”, “Quick Edit”, “Trash”, and “View”, as shown below.

The “Quick Edit” feature is useful. It allows you to quickly modify the following important settings:
- Title
- Slug
- Date
- Password, or make the post Private
- Categories
- Tags
- Status

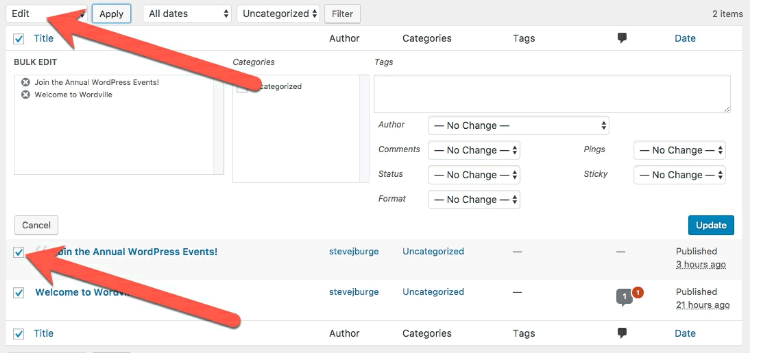
Also a very useful feature is the “Bulk Edit” setting. You can select many different posts and change many attributes of the posts all at once.
- Select the posts you want to bulk edit.
- Select “Edit” and “Apply”.
- You’ll now have the ability to edit all of these posts at the same time:
