We are going to take a look at pages in WordPress.
This is the point at which your WordPress site moves away from being a blog and starts to become a real website.
After reading this chapter, you will be able to:
- Choose a custom homepage and a news page.
- Create a menu, and add pages to the menu.
- Set up parent and child pages.
- Create a dropdown menu of pages.
WordPress Pages Includes the following featues ….
- Creating ‘Pages’ in WordPress
- Setting your ‘HomePage and New Pages’ in WordPress
- ‘Adding Pages to Menus’ in WordPress
- ‘Pages and Child Pages’ in WordPress
1. Creating ‘Pages’ in WordPress
One of the first things that we are going to do is build a homepage. Then we’ll move our Wordville news to a news page.
Let’s take a look at how to do that. In the admin area on the left sidebar, there is a “Pages” section. You may already have two pages: “About Wordville” and “Sample Page”.

We don’t need a page on the site called “Sample Page”, so let’s rename and repurpose that page.
- Click “Edit” under “Sample Page”.
- Change the title to “Wordville Location”.
You can now clean up the text in this page:
- Delete all the existing blocks, except for the first Paragraph block. As a reminder, you can delete blocks by clicking the three-dot icon in the top-right corner and then clicking “Remove Block”.

- Enter this new text: Wordville is a place with a wonderful community. Come and move here. You’ll agree that Wordville is a very enjoyable place to live.
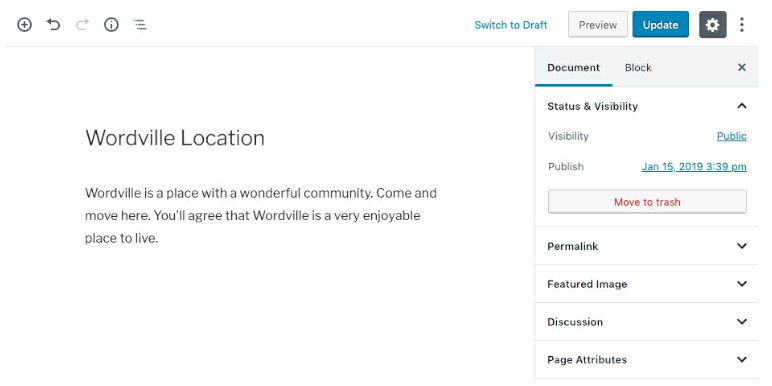
Take a step back now and look at the whole page. What’s missing compared to the posts you created earlier?
What differences did you spot?
- There are no Categories.
- There are no Tags.
- Several boxes are missing from the right sidebar.
By design, the pages are much simpler than the posts you created earlier. In an earlier chapter, we mentioned that pages also don’t have author names, publishing dates, or comments enabled by default.
My advice is to use pages for content that will not change very often.
2. Setting your ‘HomePage and News Page’ in WordPress
One good example of a page that may not change very often is your homepage. Some busy sites may update their homepage constantly, but many other websites go months without updating their homepage.
In this exercise, let’s see how to use pages to create a new homepage.
- On the “All Pages” screen, click “Add New”.
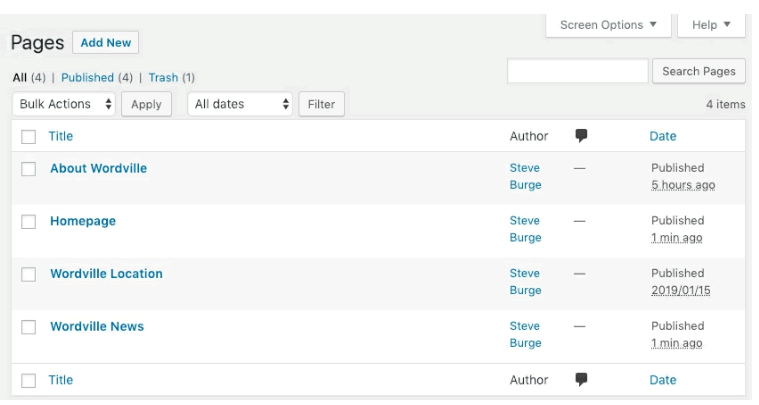
- Create and publish a page called “Homepage”.
- Create and publish a page called “Wordville News”.
- Your “All Pages” screen will now look like this:
WordPress has a special way of deciding which page gets to be the homepage.
- Go into “Appearance”, then “Customize”.
- Click “Homepage Settings”.

On this screen, you can choose the options for the homepage.
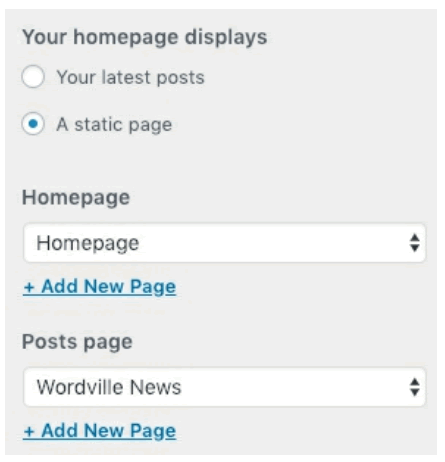
From the “Homepage” dropdown menu here, you can choose which page will be the front page of your website, as shown in the image below.
- Set the “Homepage” option to “Homepage”.
- Set the “Posts page” option to “Wordville News”.
- Click the blue “Publish” button.
- Go back to the “All Pages” screen, and you’ll see that both pages are labelled with those new settings:

- Click “View” for the “Wordville News” page, and you should see a list of all your posts.
- Click “View” for the “Homepage” page, and you should see a blank screen like the one below.

3. ‘Adding Pages to Menus’ in WordPress
Using the steps above, we now have control over our homepage and our news page.
However, there’s something missing – those pages aren’t easily visible.
We need to make sure that our pages can be easily found.
- On the front of your site, click “Customize” in the admin toolbar.
- Click “Menus” in the left sidebar:
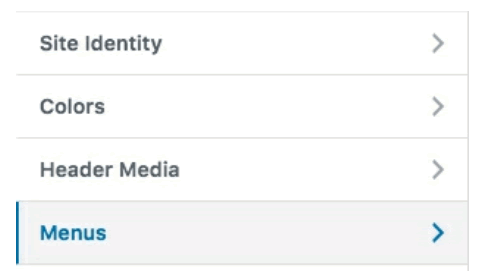
- WordPress will offer you the chance to create a menu for your links. Click “Create New Menu”:

- Menu Name: Main Menu
- Menu Location: Top Menu
- Click “Next”.

Now you’ve successfully created a menu for your links. The next step is to put the links into the menu.
- Click “Add Items”.

- Click the “+” icons next to “Homepage”, “Wordville News”, “About Wordville”, and “Wordville Location”.
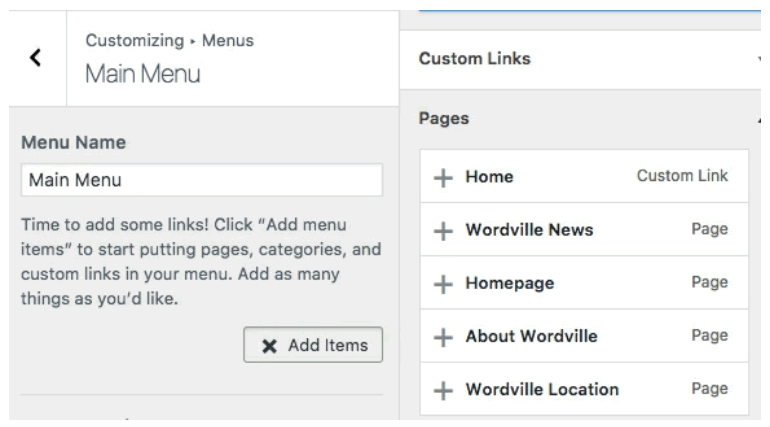
- As you add those menu links, you will start to see them appear on the left-hand side of the screen:

- Click “Publish” to save your changes. You now have a navigation menu that shows your pages so that visitors can find them easily.
4. ‘Pages and Child Pages’ in WordPress
One of the key differences between posts and pages is the idea of parent and child pages.
This is signficantly different from the parent and child categories we used for posts. Here’s a short explanation of the differences:
- A post can be assigned to multiple categories, including both a parent and a child category.
- A page can only be either a parent or a child page, and it can only be linked to one other page.
Let’s see how the Parent / Child system works for pages.
In this exercise, we’ll build an “Attractions” page that is linked to pages for the Wordville Aquarium, Zoo and Museum.
In the Resources folder that you downloaded, you’ll find text for all these pages inside a file called attractions-text.txt.
- Go to the “All Pages” screen.
- Create and save a page called “Attractions”.
- Create and save a page called “Aquarium”.
- In the “Page Attributes” box of the “Aquarium” page, choose “Attractions” from the “Parent” dropdown:

- Create a page called “Museum” and choose “Attractions” as the “Parent”.
- Create a page called “Zoo” and choose “Attractions” as the “Parent”.
- Once you’ve saved your pages, visit the “All Pages” screen, and it should look like the image below. You can see that the child pages are indented:

This is a noticeably less flexible system than the one we saw with categories. However, it’s one of the best things we can do to organize pages.
In the chapter called “WordPress Plugins Explained”, we’ll show you how to add plugins. Some plugins offer the ability to show these child pages in useful ways on your site.
However, for now, let’s use the following approach to show these child pages on your site.
- Click the “Customize” button in the admin menu, or go to “Appearance” and then “Customize”.
- Click “Menus”.
- Click “Main Menu”.
- Click “Add Items”.
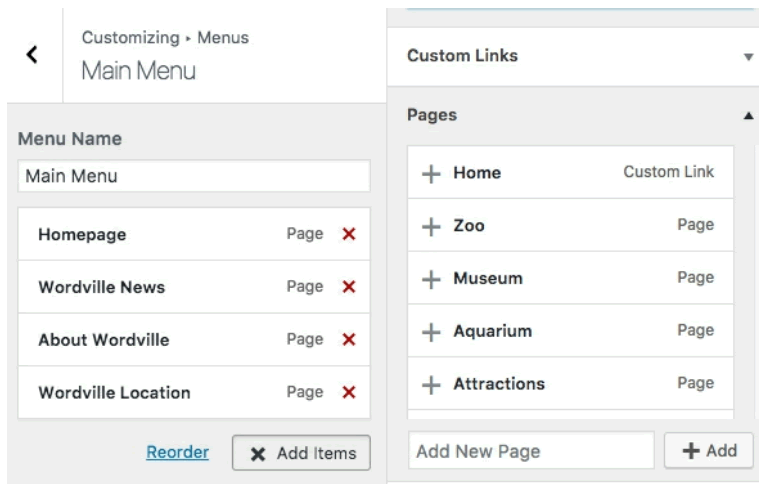
- Drag-and-drop the “Attractions”, “Aquarium”, “Museum”, and “Zoo” pages from the right-hand column to go underneath the “Main Menu” links in the left-hand column.
- When you have added the pages to the left-hand column, you can drag-and-drop the links to reorder them. Rerrange the links so that the individual attractions are indented under the main “Attractions” page:

- Scroll over to the right side of the screen, and you should see that you now have a dropdown menu for your main “Attractions” page and child pages!
- Don’t forget to hit “Publish” when you’re finished.

Why did we cover menu links in this chapter called “WordPress Pages Explained”? We covered them here because it is difficult for people to see your pages unless you add them to a menu. It is the combination of pages and menus together that allows you to turn a basic WordPress blog into a real WordPress site.


